

Dream Car Decals
Posted on
Our tech blog is back! In today's post, client engineer, Tom has been exploring car customisation options. Here's Tom with a deep dive on his system for placing decals on a car...

Introduction
Last year I spent a few of my fortnightly Personal Project Days working on a way to free-hand paint onto our cars in order to create some unique custom decals (additional stuck-on car decoration). It was a success, and also a lot of fun, so when I recently had some down-time between projects here at Hutch, I decided to take this tech to the next level.
Free-hand painting on a car is fun, but it’s hard to make something look good; my lines are never straight, nothing’s even, and I keep colouring over the lines! This is probably why all the biggest car games out there with car customising features have you placing pre-set stickers on the cars instead.
So that’s what I set out to achieve; a system for placing pre-designed sticker templates onto a car.
What Do I Mean By “Decal”?
For us when we’re working with car models, a ‘decal’ is an additional image with the content drawn in respect to the UV space of the car model, that can be rendered on top of the configured car paint colouring.

Above you can see an example of a decal pattern on a car model, and the equivalent decal image needed to create it. The decal image has been modified to clearly show the car section outlines; normally it would be completely transparent except for the decal pattern content.
How do we ‘paint’ onto our Car Model?

Our first challenge is to convert a cursor input from world space in the scene, into the model's local UV space. Basically we want to draw a circle on the car where the mouse is.
One way of doing this would be to Physics.Raycast() into the scene with a Ray mimicking the mouse input direction through the camera:
Ray ray = camera.ScreenPointToRay(Input.mousePosition);Then tell the shader the ray collision point and paint any fragments within a certain distance.
However, this approach requires the model to have a fairly accurate collision mesh (a big rectangle won’t do!), which could introduce performance issues as collision checking high-poly meshes is quite computationally expensive. Therefore we opted for an approach that wouldn’t rely on raycasting.
Instead we moved the ‘is it pointing at the car’ logic to be handled inside the shader. We take that same mouse input ray, but transform the ray’s world-space origin and direction vectors to be in the local space of the car model, and then pass these into our shader.
brushPos = car.InverseTransformPoint( inputRay.origin );
brushDir = car.InverseTransformDirection( inputRay.direction );
Inside the shader, we make sure our vertex shader passes through access to the local position and normal of each fragment. Then inside the fragment shader we project each fragment position onto our paintBrush input ray, and compare the distance offset with our brush size to determine whether it is inside our paintbrush radius or not.
We use the fragment’s normal direction to get the dot-product with our input paint direction, and then can ignore fragments that aren’t facing up at the paint brush. This prevents fragments on the other side of the car from getting painted, as well as any nearby fragments that are at a drastically different angle.
float3 _PaintBrushPos;
float3 _PaintBrushDir;
half _BrushSize;

v2f vert (appdata v)
{
    v2f o;
    o.vertex = v.vertex;
    o.normal = v.normal;
    return o;
}

fixed4 frag (v2f i) : SV_Target
{
    float fragDistanceFromBrushPos = distance( i.vertex, _PaintBrushPos );
    float3 projectedBrushPositionAtFragDistance = _PaintBrushPos + _PaintBrushDir * fragDistanceFromBrushPos;

    fixed4 col = _PaintColour * (1.0 - step( _BrushSize, distance( i.vertex, projectedBrushPositionAtFragDistance ) ));

    // Ignore painting on surfaces that aren’t facing us
    col *= step( 1.0 - _BrushAngleThreshold, dot( _PaintBrushDir, i.normal ) * -1.0 );

    return col;
}
So now we have a ‘paint’ circle appearing on our car at the mouse’s position, but nothing is persisting yet. Our second challenge is to write this painted circle to a RenderTexture to persist it across frames, and let people actually draw something!
To do this we’re going to make use of Unity CommandBuffer’s; these can be used to list out a sequence of Graphics commands to be run at set points during the rendering process. We’re using them to render our car mesh with a material that’s using our shader, and write the output into a RenderTexture, once per frame after all other camera rendering has finished.
private void Start
{
    m_runTimeTexture = new RenderTexture( textureSize, textureSize, 0 );
    m_paintedTexture = new RenderTexture( textureSize, textureSize, 0 );

    m_paintingMat = new Material( m_decalPainterShader );
    m_paintingMat.SetTexture( "_MainTex", m_paintedTexture );

    CommandBuffer commandBuffer = new CommandBuffer();
    commandBuffer.SetRenderTarget( m_runTimeTexture );
    commandBuffer.DrawMesh( m_carMesh, Matrix4x4.identity, m_paintingMat );
    Camera.main.AddCommandBuffer(CameraEvent.AfterEverything, commandBuffer );
}

public void ApplyPaint()
{
    Graphics.Blit( runTimeTexture, m_paintedTexture );
}
We maintain two RenderTexture’s; a painted texture, which has all of the persisted paint inputs so far, and then a runtime texture, which is always the painted texture with the current paint input preview rendered onto it. When the mouse button is held down we copy the contents of the runtime texture into the painted texture to keep it persisted (ApplyPaint()).
Using our shader as we had it earlier with this new CommandBuffer workflow would result in the RenderTextures being filled with a perspective rendering of the car model positioned at world zero, which isn’t any use for us. Remember we need our decal textures to be written in the UV space of the painted model!
To get out what we need, we need to alter our vertex shader logic a bit:
v2f vert (appdata v)
{
    v2f o;
    o.vertex = float4( v.uv.xy * 2.0 - 1.0, 0, 1.0 );
    o.vertex.y *= -1;

    o.position = v.vertex;
    o.normal = v.normal;
    o.uv = v.uv;
    return o;
}
Here we’re now setting the outputted vertex position value (o.vertex) to mimic its assigned UV coordinate position, but remapped to fill the camera’s viewport; UV coordinates range from (0,0) to (1,1), whereas the camera viewport ranges from (-1,-1) to (1,1), hence the required conversion.
Since we’re now overriding the vertex position, we’re now storing the original vertex position in a position field, as we still need the original position for our paintbrush radius detection logic in the fragment shader.
We’re also passing through the UV coordinates, so we can sample the painted RenderTexture referenced in _MainTex.
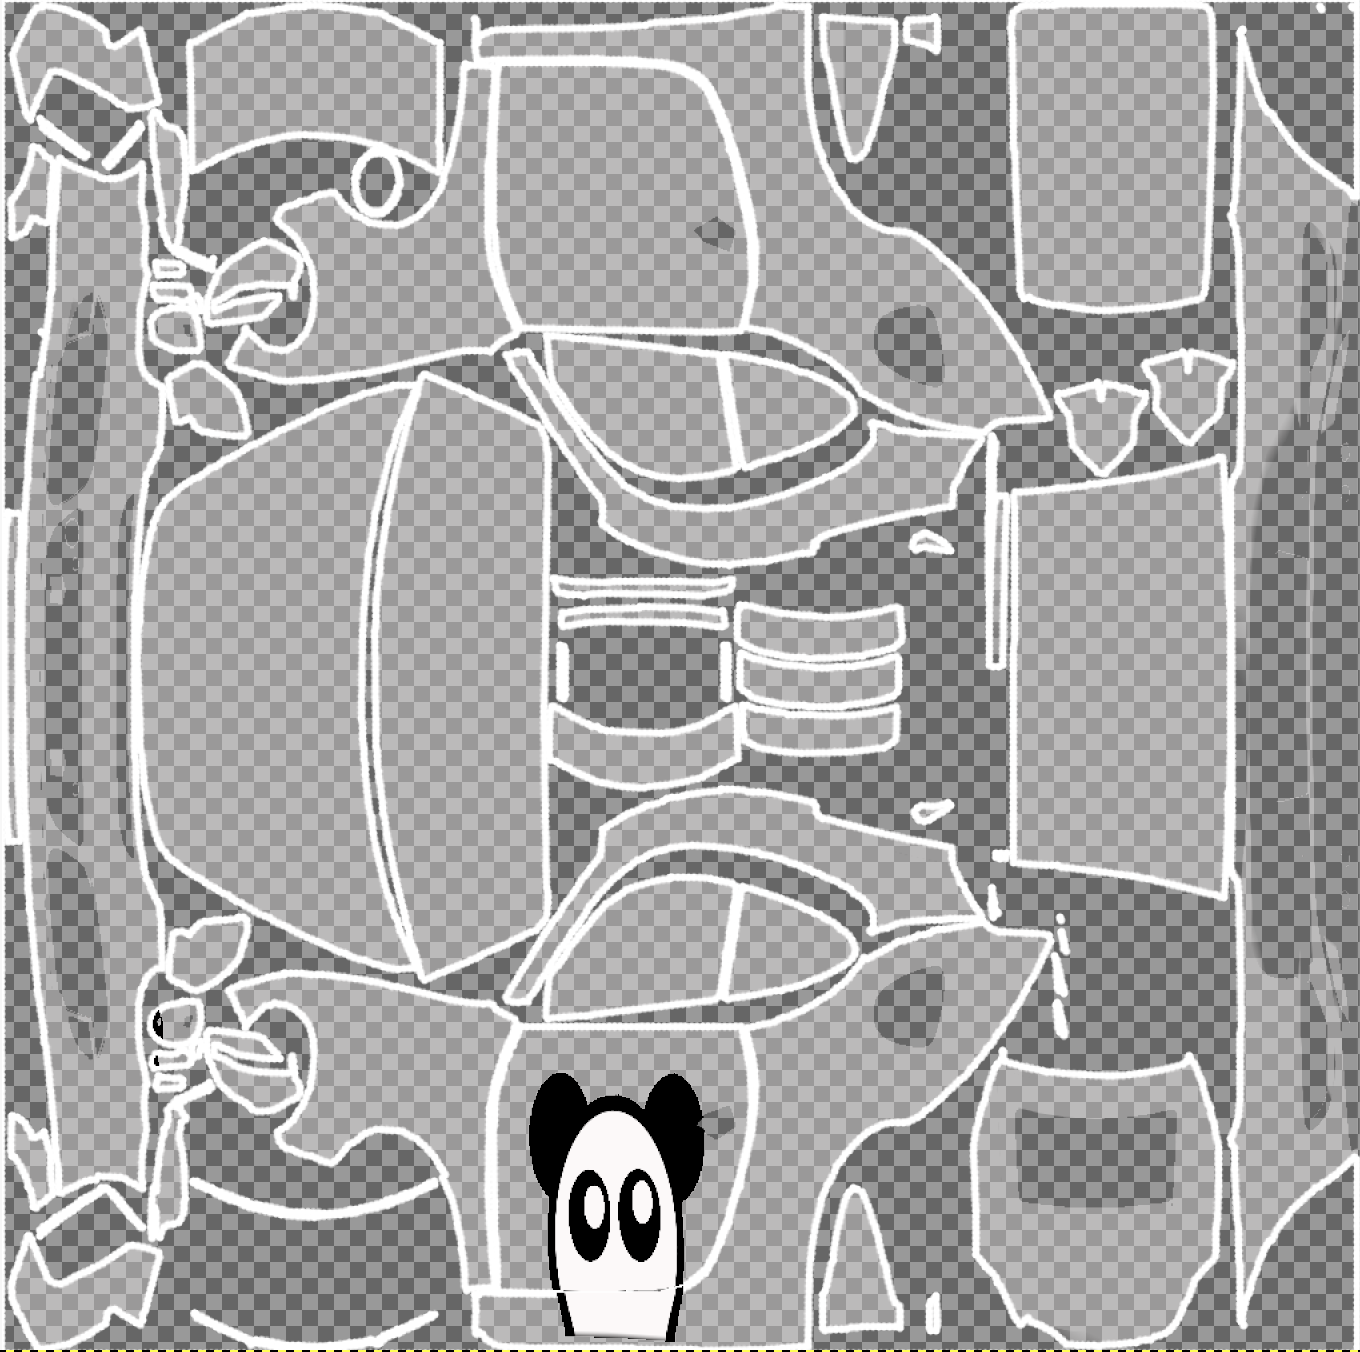
So now when our CommandBuffer calls to draw the mesh into our RenderTexture every frame, this vertex shader logic causes the model to be flattened out and rendered in its own UV space. For example, if the fragment shader returned a solid white colour for every fragment, it would generate a texture like the following:

We now have everything we need to complete the painting workflow. We have a material instance using our shader and referencing the painted RenderTexture. Every render frame we update the shader with the latest mouse ray input data, and then our CommandBuffer uses the material to draw the car mesh into our runtime RenderTexture, which renders the car out to UV space, with any new painted fragments included. On a mouse-down event, we copy over the runtime texture to the painted texture to persist the latest paint input state.
All we need now is to actually render this painted RenderTexture in the scene on our model so we can see what’s going on. Therefore after it’s been created at runtime, it’s applied to our in-scene car shader decal field, which handles drawing any decal patterns onto the car models.
How about placing Decal Images instead?

In order to support placing 2D decal images onto the car, we can actually re-use most of the same workflow as before; all that we’ll change is our fragment shader logic, and pass in some additional information to describe the position, size and orientation of our decal projection box.

With our previous shader logic for painting decals, we were providing the shader with a paintbrush origin and direction, and then checking each fragment position to see if it lies within our paintbrush’s radius. Now though we need to check if the fragments lay within a 3D-positioned decal projection box.
So we’re passing a position, size and rotation vector to describe the box's position in 3D space (local to the car again), and then using a signed distance function in order to check if the fragment is positioned inside it or not. Check out this article for details on the SDF code used: https://iquilezles.org/www/articles/distfunctions/distfunctions.htm

Once we know that the fragment lies within the box, we need to work out where it is in relation to the 2D cross-section plane of the box, in order to get a 2D coordinate to sample our decal texture at. To work this out, we’re passing in additional information to describe the box’s back-face 2D plane; the bottom left corner position, and direction vectors for the x and y axises. With this data, we can then project the fragment positions onto the 2D plane, giving us our UV coordinates.
float4 getDecalColour( float3 fragPosition, float4 boxRotation, float3 boxPos, float3 boxSize, float3 boxDecalUVOrigin, float3 boxDecalUVXAxis, float3 boxDecalUVYAxis, float boxDecalUVXScale, float boxDecalUVYScale )
{
    // Check if fragment position is within the decal box
    int boxIntersectStatus = 1 - step( 0, sdBox( rotateVector( boxRotation, fragPosition - boxPos ), boxSize ) );

    // Project fragment position onto the boxDecal UV 2D plane, relative to the bottom left origin.
    float decalUVx = dot( boxDecalUVXAxis, fragPosition - boxDecalUVOrigin ) / boxDecalUVXScale;
    float decalUVy = dot( boxDecalUVYAxis, fragPosition - boxDecalUVOrigin ) / boxDecalUVYScale;

    // Sample the decal sticker texture
    float4 decalCol  = boxIntersectStatus * tex2D(_DecalTex, float2( decalUVx, decalUVy ) );
    return decalCol;
}
And Finally I Can Make My Dream Car…
Isn’t it beautiful!
Look out for more tech blog posts coming soon! Or bookmark the tech blog here: hutch.io/blog/tech/
And for our latest tech job vacancies, head here: hutch.io/careers. We'd love to hear from you!


